
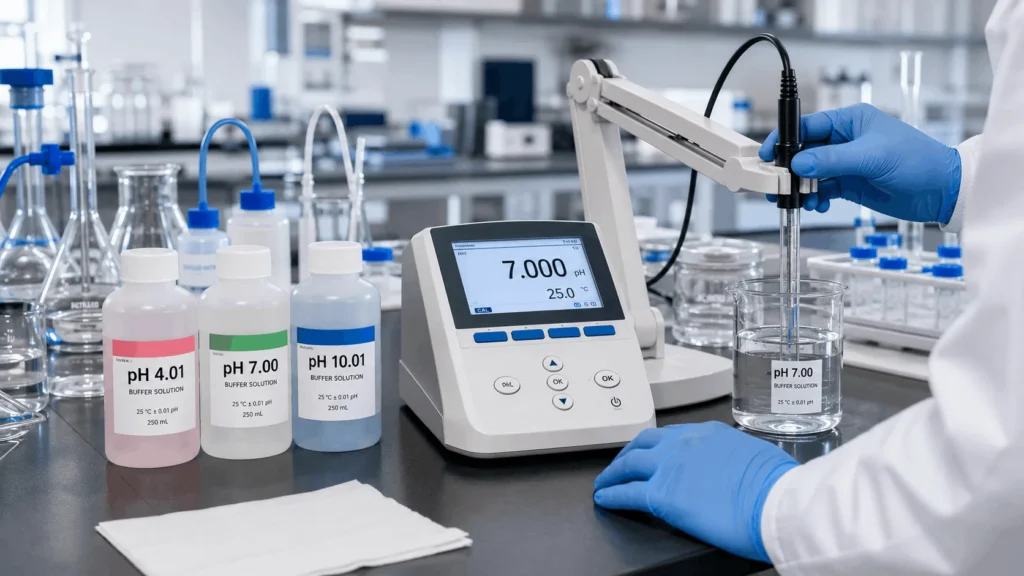
Accurate pH measurements begin with proper laboratory pH meter calibration. Even the most advanced benchtop instrument can produce unreliable results if it is calibrated incorrectly or with expired buffer solutions. Whether you’re working in a research laboratory, university teaching lab, or quality control environment, following the correct calibration procedure is essential for obtaining stable, repeatable measurements. In this step-by-step guide, you’ll learn how to calibrate a laboratory pH meter correctly, choose the right buffer solutions, avoid common calibration mistakes, and verify that your instrument is ready for accurate pH analysis.
Why Is Laboratory pH Meter Calibration Important?
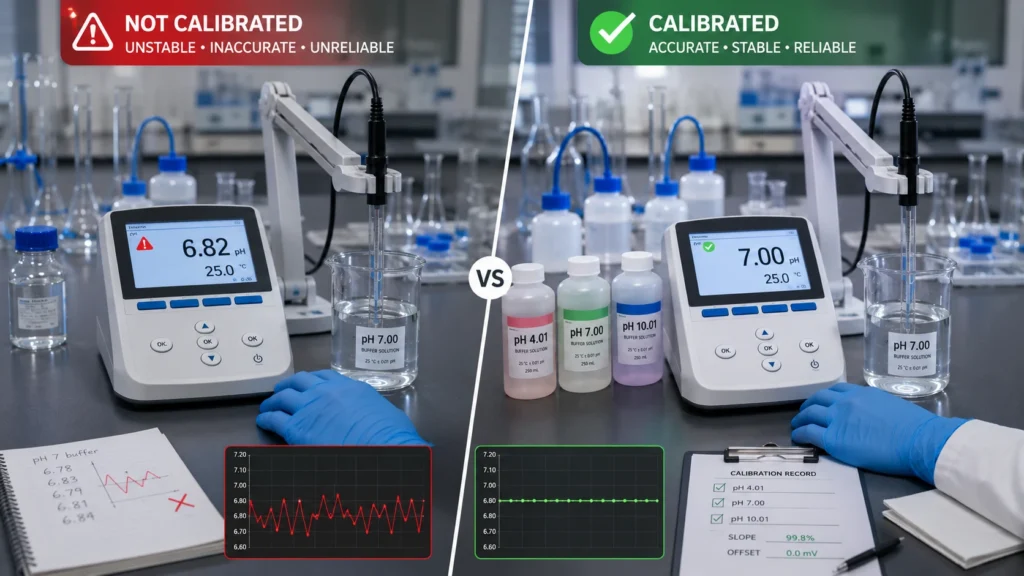
Laboratory pH meter calibration ensures that every pH measurement reflects the true acidity or alkalinity of a sample. Over time, pH electrodes naturally drift due to aging, contamination, temperature changes, and repeated exposure to different chemical solutions. Without regular calibration, even a high-quality benchtop pH meter can produce inaccurate readings that affect experimental results, quality control processes, and laboratory documentation.
Proper calibration aligns the instrument with certified buffer solutions before measurements begin. This simple procedure improves accuracy, repeatability, and confidence in the final data, making it an essential step for analytical chemistry, research laboratories, university teaching labs, environmental testing, and industrial quality assurance.
When Should You Calibrate a Laboratory pH Meter?
The frequency of laboratory pH meter calibration depends on how the instrument is used, the type of samples being analyzed, and the level of accuracy required. While there is no universal schedule, most laboratories follow standard calibration practices to ensure reliable and repeatable measurements.
As a general rule, a laboratory pH meter should be calibrated:
- At the beginning of each working day
- Before performing high-precision measurements
- After replacing or cleaning the pH electrode
- When measuring samples with significantly different pH values
- Whenever the instrument has been unused for an extended period
Research laboratories, analytical chemistry facilities, and quality control laboratories often calibrate their pH meters more frequently because even small measurement errors can influence experimental results. Regular calibration not only improves measurement accuracy but also helps detect aging electrodes before they affect laboratory data.
💡 Best Practice
For the highest measurement accuracy, calibrate your laboratory pH meter with fresh certified buffer solutions before starting any critical experiment or analytical measurement.
How to Calibrate a Laboratory pH Meter: Step-by-Step
Before starting the calibration process, make sure your laboratory pH meter, electrode, and certified buffer solutions have reached the same ambient temperature. Using fresh buffer solutions and a clean electrode helps ensure accurate, stable, and repeatable calibration results.
Step 1: Prepare the Buffer Solutions
Prepare fresh certified buffer solutions, typically pH 4.01, pH 7.00, and pH 10.01, depending on your expected sample range. Pour each buffer into a clean beaker rather than inserting the electrode directly into the original bottle to avoid contamination.
Step 2: Rinse the Electrode
Rinse the pH electrode thoroughly with distilled or deionized water before every calibration point. Gently blot the electrode dry with a lint-free laboratory tissue instead of wiping it, as wiping may create static charges that affect the measurement.
Step 3: Calibrate Using the Neutral Buffer
Immerse the electrode in the pH 7.00 buffer solution and wait until the reading stabilizes. Start the calibration procedure according to the manufacturer’s instructions and allow the meter to recognize the buffer automatically if automatic buffer recognition is available.
Step 4: Complete Multi-Point Calibration
Repeat the same procedure using pH 4.01 and pH 10.01 buffer solutions when higher accuracy is required. Multi-point calibration provides better accuracy across a wider measurement range than single-point calibration.
Step 5: Verify the Calibration
After calibration, place the electrode back into a certified buffer solution to confirm that the displayed value matches the expected pH within the instrument’s specified accuracy. If the reading is unstable or inaccurate, inspect the electrode for contamination or damage before repeating the calibration.
Common Laboratory pH Meter Calibration Mistakes
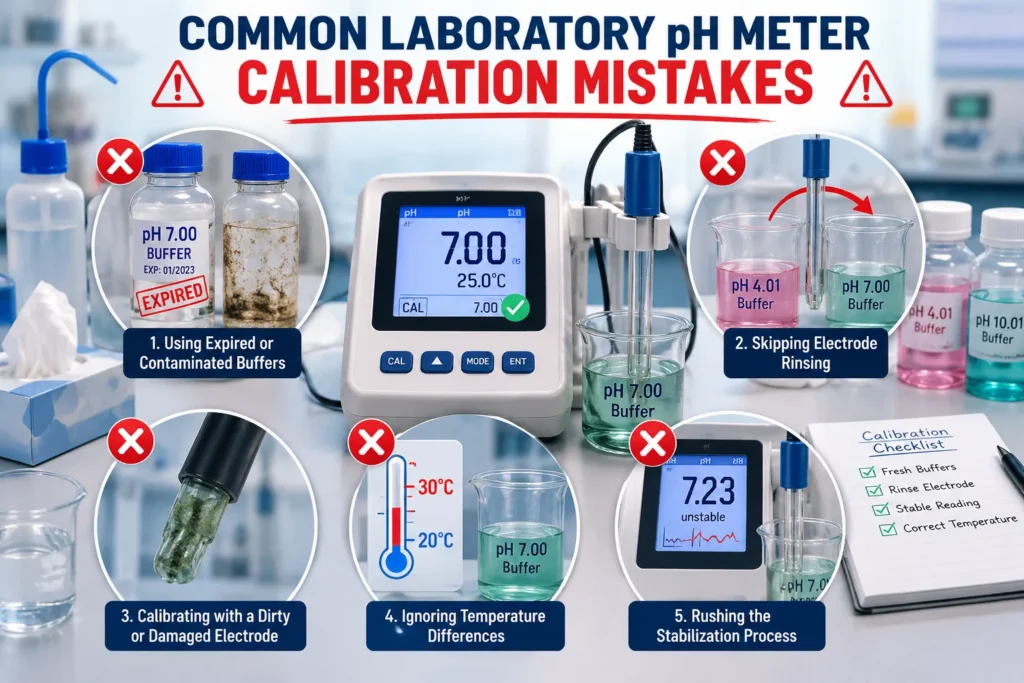
Even when using a high-quality laboratory pH meter, calibration errors can still occur if proper procedures are not followed. Most calibration problems are caused by simple mistakes that are easy to prevent but can significantly reduce measurement accuracy and repeatability.
Below are some of the most common calibration mistakes and the best ways to avoid them in everyday laboratory work.
Using Expired or Contaminated Buffer Solutions
Calibration is only as accurate as the buffer solutions being used. Always use fresh, certified buffer solutions and never return used buffer back into the original bottle, as contamination can alter its pH value.
Skipping Electrode Rinsing
Failing to rinse the electrode between buffer solutions can transfer small amounts of one buffer into another, leading to inaccurate calibration points. Always rinse the electrode with distilled water and gently blot it dry before moving to the next buffer.
Calibrating with a Dirty or Damaged Electrode
A contaminated or aging electrode may respond slowly or produce unstable readings even after calibration. Inspect the electrode regularly and clean it according to the manufacturer’s recommendations before assuming the meter is faulty.
Ignoring Temperature Differences
Calibration buffers and samples should be at approximately the same temperature whenever possible. Large temperature differences can increase stabilization time and reduce calibration accuracy, even when automatic temperature compensation (ATC) is available.
Rushing the Stabilization Process
One of the most common mistakes is confirming a calibration point before the reading has fully stabilized. Waiting a few extra seconds for a stable measurement can significantly improve the accuracy and repeatability of your results.
📖 Recommended Reading
Using a high-quality laboratory pH meter is just as important as following the correct calibration procedure.
🔬 Explore the Best Laboratory pH Meters for Research & Education Labs →
How to Verify Your pH Meter Calibration
Completing the calibration process does not automatically guarantee accurate measurements. Before analyzing important samples, it’s good laboratory practice to verify that the instrument is performing correctly using a certified buffer solution.
After calibration, rinse the electrode with distilled water and place it back into a fresh buffer solution, such as pH 7.00. The displayed value should match the certified buffer within the manufacturer’s specified accuracy and remain stable after a short stabilization period.
If the reading is noticeably different, unstable, or drifts continuously, inspect the electrode for contamination, verify that fresh buffer solutions were used, and repeat the calibration procedure if necessary. Persistent calibration problems may indicate that the electrode requires cleaning, reconditioning, or replacement.
✅ Pro Tip
Always verify your calibration with a fresh certified buffer solution before measuring valuable laboratory samples. This quick check can prevent costly experimental errors.
| Observation | Possible Cause | Recommended Action |
|---|---|---|
| Stable & accurate reading | Calibration successful | Begin measurements |
| Reading drifts slowly | Dirty electrode | Clean the electrode |
| Incorrect value | Expired buffer | Replace buffer solution |
| Slow response | Aging electrode | Clean or replace electrode |
| Calibration fails | Electrode damage | Inspect or replace electrode |
Final Tips for Accurate Laboratory pH Measurements
Accurate laboratory pH measurements depend on more than completing a successful calibration. Using fresh certified buffer solutions, maintaining a clean electrode, allowing readings to stabilize, and verifying calibration before analyzing important samples all contribute to reliable and repeatable results.
Developing consistent calibration habits not only improves measurement accuracy but also extends electrode life and reduces the risk of experimental errors. Whether you’re working in analytical chemistry, research laboratories, quality control, or university teaching labs, following proper calibration procedures should always be part of your routine laboratory workflow.
📖 Recommended Reading
Looking for expert recommendations before purchasing a laboratory pH meter?
🔬 Best Laboratory pH Meters for Research & Education Labs →
Frequently Asked Questions
A laboratory pH meter should usually be calibrated at the beginning of each working day and before critical measurements. Research and quality control laboratories may calibrate more frequently, especially when measuring sensitive samples or working across different pH ranges.
Most laboratory pH meters are calibrated using certified pH 4.01, pH 7.00, and pH 10.01 buffer solutions. The correct buffer set depends on the expected pH range of the samples being measured.
Single-point calibration can be used for simple routine checks, but two-point or three-point calibration is recommended for accurate laboratory measurements. Multi-point calibration improves reliability across a wider pH range.
A pH meter may fail to calibrate because of contaminated buffer solutions, a dirty or aging electrode, temperature differences, or unstable readings. Cleaning the electrode, replacing the buffer, and repeating the calibration usually solves most problems.
Yes. Always rinse the pH electrode with distilled or deionized water between buffer solutions. Gently blot it dry with a lint-free tissue to prevent cross-contamination and improve calibration accuracy.
After calibration, place the electrode into a fresh certified buffer solution and check whether the reading matches the expected pH value within the meter’s accuracy range. Stable readings indicate successful calibration.